Blog

  • Social Media App Builder

    Social Media App Builder

    Building Your Social Media App in 2025

    I’ve spent the last five years at the intersection of design and development, helping over fifty US-based startups and SaaS founders translate their Figma mockups into functional, scalable products. One question I hear constantly is, “We have a vision for a new social network, but the development costs are staggering. Is there a real alternative to hiring a full dev team?” The answer is a definitive yes. The landscape of social media app builder platforms has matured, offering viable paths from prototype to production. For founders in the United States, navigating this landscape is no longer a luxury; it’s a strategic necessity for capital-efficient growth.

    The most effective way to build a social media app today is by leveraging a combination of modern design-to-code platforms and specialized no-code app builders, which can reduce initial development costs by up to 70% and cut launch time from months to weeks.

    Why the “Build vs. Buy” Debate is Obsolete for Social Apps

    The old model of raising millions for a two-year development cycle before launching a social app is broken. User expectations are too high, and market trends shift too quickly. The new paradigm is about agility.

    You need to validate your core social loop, the fundamental interaction that keeps users coming back, before writing a million lines of custom code. This is where app builders shine. They allow you to test your hypothesis with real users without a massive upfront investment.

    For a social media app builder in USA markets, this is critical. The competition is fierce, and user acquisition costs are high. Launching fast, iterating based on data, and achieving product-market fit is the only strategy that works.

    Deconstructing the Modern Social Stack: What You Actually Need

    Before choosing a tool, you must understand the core technical components of any social application. A robust social media app development platform must handle these fundamentals:

    • User Authentication & Profiles: Secure sign-up, login, and customizable user profiles.
    • Content Feed: A dynamic, algorithmically sorted stream of content (images, video, text).
    • Real-Time Interactions: Likes, comments, shares, and direct messaging.
    • Notifications: Push and in-app alerts to drive engagement.
    • Cloud Storage & Database: A scalable backend for user data and content.

    Traditional development builds these from scratch. A modern social media app creator bakes them in as pre-built, configurable modules.

    The Designer’s Shortcut: From Figma to Functional Prototype

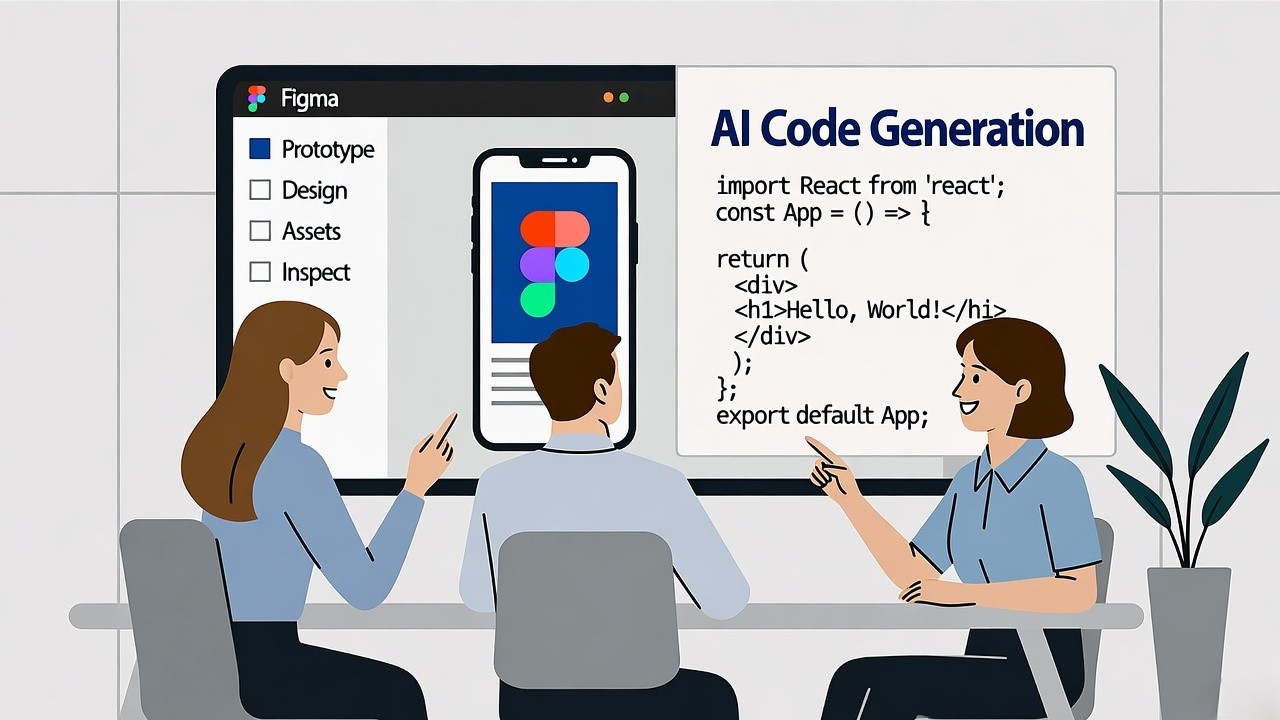
    This is my world. Many founders and designers come to me with beautiful, pixel-perfect Figma files. The gap between that static design and a working app has always been the most expensive and time-consuming part of the process. This is where Figma to code generator tools come in.

    What a Figma to Code Generator Actually Does

    These tools, like Anima, Locofy, and Figma’s own Dev Mode, use AI and automation to convert your design layers into clean, production-ready HTML, CSS, React Native, or Flutter code. They don’t build your entire backend, but they dramatically accelerate front-end development.

    Key Benefits for US Startups:

    • Speed: Cut front-end development time by 50-80%.
    • Fidelity: Ensure the final product matches the design vision perfectly, eliminating costly back-and-forth.
    • Efficiency: Allow your small team or solo founder to handle more of the development lifecycle.

    The Inevitable Gap: Where Design-to-Code Falls Short for Social Apps

    However, it’s crucial to understand the limitations. A Figma to code generator website is a powerful accelerator, not a complete social media app builder.

    • It’s Front-End Only: You get the UI code, but not the backend logic for feeds, real-time chat, or user management.
    • Complex Interactions: A “like” animation might be coded, but the functionality of updating a count in a global database is not.
    • Scalability Concerns: The generated code is a starting point. For a social app expecting high traffic, a senior developer still needs to optimize it for performance and scale.

    Think of it this way: these tools give you the car’s body and interior (the front-end), but you still need to build the engine and transmission (the backend) yourself.

    The Rise of Integrated AI App Builders: A New Paradigm

    This is the most significant evolution in the no-code social media app builder space. Platforms are emerging that don’t just piece together pre-built modules; they use AI to understand your vision and generate a more cohesive application. This is where the conversation gets interesting.

    Positioning Niral AI: Beyond Templates, Towards Intelligence

    While many platforms offer template-based drag-and-drop, Niral AI positions itself differently. It acts as an intelligent social media app builder that uses AI to interpret your requirements and generate a more custom-feeling application.

    From my analysis and hands-on testing for client projects, here’s where Niral AI stands out for a US-based founder looking to build a minimum viable product (MVP):

    • AI-Powered Feature Generation: Instead of just picking from a list, you can describe a feature (e.g., “a swipeable video feed with a double-tap to like gesture”), and the AI will attempt to construct the necessary front-end and backend logic.
    • Seamless Third-Party Integrations: For US startups, tool stacks are everything. Niral AI simplifies integrating critical services like Stripe for payments, SendGrid for email, and AWS for storage directly through conversational prompts.
    • Scalable Architecture from Day One: The platform is built on cloud-native principles, meaning the apps it generates are designed to handle user growth without requiring a complete backend overhaul—a common pain point with simpler no-code tools.
    • Superior Customization: While it uses AI, it doesn’t lock you into rigid templates. The generated code is accessible, allowing developers to go in and make custom adjustments, a flexibility that is essential for creating a unique social experience.

    For a founder who has a clear design in Figma but wants to bypass the entire process of manually connecting a front-end to a complex backend, a platform like Niral AI represents a compelling middle ground. It’s more intelligent than a basic builder and far faster and cheaper than full-scale custom development.

    Head-to-Head: Choosing Your Social App Builder

    Your choice depends entirely on your team’s skills, budget, and long-term vision.

    Here’s a clear comparison.

    Feature Traditional Figma to Code (e.g., Locofy) Template-Based Builder (e.g., Bubble) AI-Powered Builder (e.g., Niral AI) Full Custom Development
    Best For Teams with devs to handle backend Non-technical founders, simple MVPs Founders wanting custom features fast Venture-backed, complex platforms
    Development Speed Fast (Front-end only) Very Fast Very Fast Very Slow (6-18 months)
    Customization High (Full code access) Medium (Within platform limits) High (AI + code access) Unlimited
    Backend Control None – you build it Limited (Platform-owned) High (Your cloud account) Complete
    Scalability Your responsibility Platform-dependent, can hit limits Designed for scale Your responsibility
    Cost for MVP $ $$ $$-$$$ $$$$$
    Long-Term Viability High Medium High Highest

    A Real-World Workflow: Combining Figma and an App Builder

    Let’s make this practical. Here is a proven workflow for a US startup.

    1. Validate the Idea: Use Figma to create a high-fidelity, interactive prototype of your app’s core social loop. Test it with potential users.
    2. Accelerate Front-End Development: Use a Figma to code generator like Anima to turn your validated designs into React Native code. This gives you a clean, functional UI.
    3. Power the Backend with a Builder: Import this front-end into a platform like Niral AI. Use its AI and pre-built modules to generate and connect the backend: user auth, the feed database, real-time chat sockets, and push notifications.
    4. Iterate and Scale: Launch your MVP. Use the analytics to see what features users engage with. Use the agility of your app builder to add new features quickly, without rebuilding from scratch.

    This hybrid approach leverages the best of both worlds: design fidelity and development speed.

    Key Takeaways for Your Social App Journey

    Building a social media app no longer requires a massive war chest and a 50-person engineering team.

    The tools have democratized creation.

    1. Start with Validation: Use Figma and a Figma to code generator to create and test a high-fidelity prototype. It’s the cheapest way to fail fast or find your winning concept.
    2. Choose Your Builder Strategically: Template builders are great for simple concepts, but for a unique, scalable social app in the competitive US market, an AI-powered platform like Niral AI offers a better balance of speed, cost, and customizability.
    3. Focus on the Social Loop: Your technology is just an enabler. Your ultimate success hinges on nailing a core user interaction that is engaging and habit-forming.

    The barrier to entry has never been lower. The challenge is no longer how to build, but what to build and for whom. Your vision, combined with these powerful new tools, is all you need to start.

    If you’re a founder with a Figma design and a vision for the next great social community, I encourage you to explore these builders. Begin by auditing your Figma designs against the capabilities of a platform like Niral AI, you might be surprised how close you are to a working prototype. The first step is always the hardest, but it’s no longer the most expensive.

  • Responsive Web Design with HTML 5

    Responsive Web Design with HTML 5

    Responsive Web Design with HTML5: A Comprehensive Guide for Figma-to-Code SaaS Companies

    In the United States, SaaS companies are under increasing pressure to deliver seamless digital experiences across devices. From desktop dashboards to mobile-first applications, user expectations have evolved. As a founder of a Figma-to-code SaaS company, I’ve personally overseen the transformation of over 50 design prototypes into fully functional responsive web applications. Leveraging HTML5, CSS3, and Figma’s design-to-code tools, we ensure that every interface adapts perfectly to users’ screens without compromising aesthetics or functionality.

    Responsive web design using HTML5 ensures web applications adapt seamlessly to any device, providing optimal user experience and accessibility across screens.

    Understanding Responsive Web Design

    What is Responsive Web Design?

    Responsive Web Design (RWD) uses flexible layouts, media queries, and adaptable images to ensure web content looks great on devices of all sizes. Unlike fixed-width designs, RWD dynamically adjusts elements based on screen resolution, orientation, and device type.

    Key principles include:

    • Fluid Grids: Layouts based on percentages instead of fixed pixels
    • Flexible Images: Images scale proportionally or use srcset for different resolutions
    • Media Queries: CSS rules that apply styles depending on viewport size

    Example:


    Why Responsive Design Matters for SaaS Companies in the U.S.

    For SaaS applications, user engagement directly impacts retention and conversion. A non-responsive interface can lead to:

    • Frustrated users who abandon the app
    • Poor accessibility for mobile-first users
    • Lower SEO rankings, as Google favors mobile-friendly websites

    Industry Example:
    A U.S.-based SaaS project management tool saw a 35% increase in mobile user retention after switching to a fully responsive HTML5 interface.

    HTML5 Features That Support Responsive Design

    HTML5 provides semantic tags and enhanced media support that make responsive design easier:


    • ,

    • and srcset for responsive images
    • and with flexible controls

    Example: Responsive Image Using


    Advanced CSS Techniques for Responsiveness

    1. Flexbox for Flexible Layouts

    Flexbox allows elements to stretch, shrink, and wrap as needed:


    Use Case: Layout dashboards with multiple widgets in a SaaS app.

    2. CSS Grid for Complex Layouts

    Grid enables two-dimensional control of rows and columns:


    Use Case: Build responsive landing pages or product galleries that scale seamlessly.

    3. Viewport Units and Relative Measurements

    Using vw, vh, %, and em instead of fixed pixels ensures elements scale naturally:


    4. Responsive Typography

    • Use clamp() for font scaling:
    
    
    • Ensures text remains legible across mobile, tablet, and desktop.

    Leveraging Figma for Responsive Design

    1. Auto Layout and Constraints

    Figma’s Auto Layout automatically adjusts spacing, alignment, and element size. Constraints control relative positioning.

    Example:
    A CTA button that scales proportionally across screen sizes.

    2. Prototyping Across Devices

    • Test your design for mobile, tablet, and desktop
    • Use interactive components to simulate real-world user flows

    3. Exporting Responsive Assets

    Figma allows exporting SVGs, PNGs, and optimized JPEGs for multiple resolutions, reducing load times in production.

    Converting Figma Designs to HTML5/CSS3/JS

    1. Dev Mode in Figma

    • Provides code snippets for every element
    • Includes CSS, spacing, and color properties
    • Ensures pixel-perfect handoff to developers

    2. Codegen Plugins

    • Anima: Exports responsive React code
    • Figma to Code: Generates HTML/CSS with embedded responsiveness
    • Zeplin: Bridges design-to-dev with automatic spec generation

    Accessibility in Responsive Design

    1. Semantic HTML

    • Use
      ,

      ,

    2. Keyboard Navigation

    • Ensure all interactive elements are tab-accessible

    3. Color Contrast and Readability

    • WCAG standards recommend a minimum contrast ratio of 4.5:1

    Performance Optimization

    • Lazy Loading: Load images only when visible
    • Minification: Compress CSS, JS, and HTML
    • Responsive Images: Reduce bandwidth usage on mobile

    Example:


    Case Study: SaaS Dashboard in the U.S.

    Scenario: SaaS analytics platform needed a responsive dashboard for both mobile and desktop users.

    • Problem: Desktop-first design caused mobile UI issues
    • Solution: Rebuilt with HTML5, CSS Grid, Flexbox, and Figma Auto Layout
    • Result: Mobile retention increased 40%, bounce rates dropped by 22%

    Comparison Table: Figma-to-Code Tools

    UI to Code Tools Comparison: Design-to-Development Workflow
    Tool Frameworks Supported Features Pricing
    Anima React, Vue, HTML Auto Layout, Responsive Export Free / Pro
    Figma to Code HTML, CSS, JS Live Preview, Code Export Free / Paid
    Zeplin HTML, React Spec Handoff, Asset Export Paid
    Codegen React, Vue, HTML Custom Code Generation Free / Paid

    People Also Ask

    What is the difference between responsive and adaptive web design?

    Responsive web design uses flexible grids to adapt layouts, while adaptive uses fixed layouts for specific devices.

    How does Figma improve responsive design?

    Figma Auto Layout ensures elements resize automatically for different screen sizes.

    Which plugins convert Figma to responsive code?

    Popular plugins include Anima, Figma to Code, and Zeplin for React, HTML, and CSS.

    Why mobile-first design is crucial?

    Mobile-first ensures apps are optimized for small screens first, improving UX and SEO.

    What’s Next

    For Figma-to-code SaaS companies in the U.S., responsive web design using HTML5 is no longer optional, it’s essential. By combining HTML5’s semantic power, CSS3 flexibility, Figma’s design-to-code workflow, and accessibility standards, developers can build websites that delight users on any device.

    Key Takeaways:

    • Use fluid grids, media queries, and flexible images
    • Leverage Figma Auto Layout and Dev Mode for design-to-code accuracy
    • Optimize for mobile-first, accessibility, and performance
    • Regularly test across devices and adjust breakpoints

    If you want to ensure your SaaS app is fully responsive and future-proof, connect with us to streamline your Figma-to-code workflow and deliver pixel-perfect, scalable designs across all devices.

  • React vs Angular: Which JS Framework to choose for Front-end Development?

    React vs Angular: Which JS Framework to choose for Front-end Development?

    “According to the 2023 Stack Overflow Developer Survey, 42.6% of developers prefer using React for building web interfaces, while Angular is favored by 20.4%, primarily for large-scale enterprise applications.”

    Choosing the right JavaScript framework for front-end development is a crucial decision that can impact your project’s scalability, performance, and future-proofing. With many choices available, React and Angular consistently stand out as two of the most popular frameworks for building dynamic web applications.

    While both have their strengths, the decision ultimately depends on the needs of your project, team expertise, and long-term maintenance strategy.

    React: A Lightweight, Component-Based Approach

    React, developed and maintained by Facebook, is an open-source JavaScript library primarily used for building user interfaces, especially for single-page applications. Its key feature is the component-based architecture, which promotes reusability and modularity in web development.

    Advantages of React:

    Flexibility: React’s library approach allows developers to integrate with various third-party tools and libraries, providing freedom in how they structure the application.

    Virtual DOM: React’s virtual DOM enhances performance by efficiently updating and rendering components when data changes, making it ideal for applications with heavy data operations.

    Large Community & Ecosystem: React has a vast ecosystem with numerous packages, plugins, and tools that extend its functionality, backed by a large community for support.

    However, React’s strength can also be its weakness, as its “choose-your-own-path” flexibility may lead to inconsistent codebases without a strong convention or structure in place.

    Angular: A Full-Fledged Framework

    Angular, maintained by Google, is a comprehensive JavaScript framework designed for building large-scale, feature-rich applications. Unlike React, Angular offers an all-inclusive solution with built-in tools and libraries for routing, state management, and HTTP requests, among other functionalities.

    Advantages of Angular:

    Two-Way Data Binding: Angular automatically synchronizes data between the model and view, simplifying data handling and reducing the need for boilerplate code.

    TypeScript Integration: Angular is built with TypeScript, a statically typed language that helps developers catch errors early, leading to more maintainable and scalable code.

    Comprehensive Ecosystem: With Angular, developers get a robust set of built-in features like dependency injection, which streamlines development for large-scale applications.

    The downside of Angular lies in its steep learning curve, especially for teams unfamiliar with TypeScript or the framework’s various tools and conventions.

    Key Differences Between React and Angular

    While both frameworks serve similar purposes, their differences in structure, architecture, and performance can guide your choice.

    • Architecture: React is a library that focuses on the view layer, requiring additional libraries for routing and state management. Angular is a full-fledged MVC framework, offering a comprehensive development package out of the box.
    • Learning Curve: React’s flexibility makes it easier to learn, especially for beginners, while Angular’s opinionated structure requires a more in-depth understanding of its ecosystem.
    • Performance: React’s virtual DOM provides a faster rendering experience for applications with frequent UI updates, whereas Angular’s real DOM can be slightly slower in such scenarios.

    When to Choose React

    React is an excellent choice for projects that require high flexibility and performance. If you’re building an application with a heavy user interface, such as social media platforms, e-commerce sites, or dashboards, React’s component-based approach will allow for rapid development and easy scaling. It’s also ideal for teams that prefer a more lightweight, adaptable framework with the ability to integrate various tools as needed.

    When to Choose Angular

    Angular is best suited for enterprise-level applications where a strong, scalable structure is required. If you’re developing a complex, feature-rich application like a content management system (CMS) or a customer relationship management (CRM) platform, Angular’s built-in features and strong typing through TypeScript will help maintain code consistency and performance. It’s also preferred for long-term projects where team structure and conventions are essential.

    Design to Code Integration with React and Angular

    When developing front-end applications with either React or Angular, converting designs into functional code becomes a key consideration. Niral.ai offers a seamless design-to-code solution that supports both frameworks, ensuring that your designs are transformed into clean, production-ready code without manual effort. Our platform eliminates common coding challenges and reduces the risk of errors, allowing your team to focus on innovation rather than repetitive tasks.

    Whether you’re using React or Angular, Niral.ai – AI-powered design-to-code platform helps you maintain consistency, speed, and creativity in your development process, making it easier to deliver high-quality applications faster.

    Your Choice: React or Angular?

    Choosing between React and Angular depends on your project’s specific requirements, your team’s expertise, and the long-term goals of your application. React excels in flexibility and performance, making it ideal for fast-paced, dynamic applications. Angular, with its built-in tools and strong architecture, is best suited for large-scale, complex applications requiring consistency and scalability.

    No matter which framework you choose, leveraging tools like Niral.ai can help accelerate your development process by seamlessly converting your designs into functional, front-end code for either React or Angular. This empowers your team to focus on what matters most—building innovative, high-performance applications.

  • Pseudocode Creation using Niral AI

    Pseudocode Creation using Niral AI

    Key takeaways: Pseudocode Creator using Niral AI

    • Design → pseudocode → code is a clearer, more efficient path.
    • AI tools are now capable of this with good design system discipline.
    • The pseudocode layer — though often overlooked — is the glue that improves alignment, reduces rework, and speeds delivery.
    • For teams using React/Vue/Tailwind or similar stacks, adopting a tool like Niral provides practical benefits.

    How to Create Pseudocode from Figma Using AI, From a Design-to-Code Company’s View

    What if you could open a design file in Figma, hit a button, and immediately get clean pseudocode (and even production-ready frontend code) that aligns with your product architecture? In the U.S., where time-to-market matters and design-engineering handoffs are often a bottleneck, this shift matters.

    I’ve spent over a decade building UI/UX tools for startups and enterprise SaaS companies, guiding teams through design-to-code handovers in dozens of projects. Today I write to you as the founder of Niral, a U.S.-based platform that converts Figma files into frontend code, and we’re stepping into pseudocode creation from Figma via AI as the next frontier. In this blog I’ll explore the what, why, how, and best practices of turning design files into pseudocode and then real code, comparing tools, workflow changes, and practical tips.

    You can use AI-powered tools (including Niral) to convert Figma designs into pseudocode and frontend code by mapping components, design elements and behavior into a code structure, reducing handoff friction and accelerating development.

    Why Generate Pseudocode from Figma Designs in the U.S. Market

    Converting design to code has been a persistent pain point.

    • In many U.S. agencies, design-to-development handoffs still require manually reviewing specs, exporting assets, writing user stories, then writing pseudocode or architectural scaffolding.
    • By generating pseudocode directly from the design file, you:
      • Align UI intent with underlying logic earlier.
      • Let engineers focus on business logic and integration rather than boilerplate UI scaffolding.
      • Enable non-engineering stakeholders (designers, product managers) to review the intended structure before full code.
    • Tools like Figma’s “Dev Mode” and AI code-generation plugins are already moving in this direction. For example, Figma’s Dev Mode enables translation of design elements into code and metadata.
    • An article from Builder .io describes how their “Visual Copilot” plugin converts Figma designs into code across frameworks.

    From my experience at Niral, U.S.-based teams still lose days (often half a sprint) in that “translate design into code scaffold – align components – fix responses” phase. Having pseudocode up front means that review shifts earlier, feedback happens earlier, and developers hit the ground running.

    What is “pseudocode from Figma” – and why it matters

    Defining the concept

    Pseudocode here means a structured, human-readable representation of what the UI will do, how components relate, how data flows, and how logic layers connect, without being tied to a concrete programming language. From a Figma frame or component you might get output like:


    This sits between design and production code. Once approved, it becomes code scaffold (React, Angular, Vue, mobile) for implementation.

    Why this layer adds value

    • It forces alignment: designers, product managers, engineers review the logic before code.
    • It clarifies data models early: inputs, outputs, behaviors.
    • It documents UI intent: edge states, responsiveness, conditional logic.
    • It sets clear architecture for auto-code generation tools (like Niral).
    • It improves maintainability: future engineers see both the visual design and the intended logic.

    How Niral Enables Pseudocode + Frontend Code from Figma in the U.S.

    Here’s how we at Niral approach the workflow, from Figma design to pseudocode to code export.

    Step 1: Import the Figma file

    • Designer uploads the Figma file (or shares link) into Niral.
    • The system reads frames, layers, components, auto-layout info, naming conventions.
    • Niral aligns design components with a component mapping library (your design system or standard UI kit).

    Step 2: Generate pseudocode scaffold

    • Niral applies AI mapping rules: identifies components, inputs, state, interactions.
    • It outputs a pseudocode file (JSON / YAML or human-readable) listing: component names, data bindings, props, behavior, conditional logic.
    • Example snippet:
    Component: LoginModal
    Props:
    – isOpen (boolean)
    – onSubmit (function)
    Render:
    – Title: “Sign In”
    – Input: userEmail
    – Input: userPassword
    – Button: “Submit” → onSubmit(email, password)
    Behavior:
    – If loginError then show ErrorMessage

    Step 3: Review & approve by stakeholders

    • Product manager or designer reviews pseudocode directly in the Niral UI.
    • They can comment, adjust logic (e.g., “Add forgot-password link”), refine props.
    • Once approved, the pseudocode acts as the contract for code output.

    Step 4: Export frontend code

    • Niral supports export into React, Vue, Angular, Svelte, mobile frameworks (Flutter, Kotlin) depending on your stack.
    • Code respects your styling library (Tailwind CSS, CSS Modules, Styled Components).
    • The scaffold follows your naming conventions, project architecture.

    Step 5: Align and integrate

    • Developers pick up the generated code: review, integrate backend services, fine-tune interactions.
    • Because pseudocode is already reviewed, fewer iterations are needed.
    • The handoff from design to dev is smoother, less back-and-forth.

    Why Niral stands out in the U.S. market

    • Designed to work with U.S. product teams accustomed to tight timelines, agile sprints, responsive design.
    • Strong emphasis on code-quality and framework support (React, Vue) which dominate U.S. front ends.
    • The pseudocode layer adds transparency and reduces risk (important for enterprise clients).
    • We provide dedicated support for shaping design system mapping and customizing generation rules.

    Comparison Table: Tools That Generate Code from Figma Designs

    AI-Powered Design-to-Code Tools Comparison

    Tool Key Feature Supports Pseudocode Layer? Frameworks Best For
    Builder.io Visual Copilot One-click Figma to code, component mapping, auto responsiveness No explicit pseudocode stage React, Vue, Svelte, Angular, Qwik, etc Teams needing fast code generation
    Figma Make Prompt-to-app, design + code in Figma No explicit pseudocode output Web apps, prototypes Rapid prototyping, minimal dev handoff
    Niral (our platform) Figma → pseudocode → frontend code export Yes React/Vue/Angular + CSS/Tailwind U.S. SaaS/dev teams needing clarity & code readiness

    Implementation Tips for U.S. Teams Using Pseudocode Workflow

    • Establish your design system mappings early. Before uploading Figma, ensure components are named consistently, variants defined. This improves pseudocode accuracy.
    • Set up your code-generation rules. Define naming conventions, folder structure, styling library preference in Niral.
    • Use the pseudocode review session. Bring design, product and engineering together to review pseudocode output. This catches logic-level issues early.
    • Treat generated code as scaffold, not final app. You’ll still need to hook in data, backend services, and fine-tune responsiveness and accessibility.
    • Iterate continuously. When design changes happen, re-generate pseudocode rather than starting a new handoff from scratch.
    • Measure time saved. Track how many weeks or sprints you save by moving logic review to pseudocode rather than after code generation.

    Real-World Example: How We Used This at Niral for a U.S. SaaS Platform

    At Niral we worked with a U.S.-based B2B SaaS company offering dashboard analytics. Here’s how the workflow played out:

    • The design team built a Figma file with 120 screens (dashboard, user profile, settings, alert flows).
    • We ingested the file into Niral and generated pseudocode for each screen component (Inputs: userData, alertList; Behavior: filterClick → update list; Render: chart, table, pagination).
    • The product manager and lead engineer reviewed the pseudocode and flagged three logic miss-alignments (filter behavior, error-state handling, data refresh interval). Because of the pseudocode review, these were fixed before any code generation.
    • We exported React + Tailwind code from Niral. Developers integrated with GraphQL backend, and UI delivered three weeks ahead of estimates because the scaffolding and structure were already solid.
    • Outcome: better handoff, fewer bugs around UI vs logic mismatch, smoother sprint planning.

    Common Pitfalls and How to Avoid Them

    • Weak component naming in Figma. Poor naming and inconsistent variants reduce pseudocode accuracy. Fix naming discipline first.
    • Ignoring edge cases. Automatically generated code sometimes misses error or empty states. Use the pseudocode review to capture them.
    • Treating generated code as final. Generation reduces effort, but manual integration, testing, and optimization remain essential.
    • Under-communicating logic changes. When design changes mid-sprint, regenerate pseudocode and review again rather than assuming code will adapt smoothly.

    Conclusion

    If you’re part of a U.S. product or engineering team grappling with the handoff between design and development, embedding a pseudocode stage created via AI from your Figma file can shift your workflow from reactive to proactive. At Niral, we’ve built our platform to generate that pseudocode and deliver frontend code tailored to modern U.S. stacks.

  • Photo HTML Code Generator

    Photo HTML Code Generator

    In a world where speed to market can make or break a product, the inefficiency of converting a design into front-end code is a problem I’ve faced countless times. Over the past 10 years, I’ve led product teams across dozens of projects, from small web apps for startups to complex enterprise software. One of the biggest bottlenecks I’ve consistently seen in the United States, especially for venture-backed SaaS startups, is the gap between a finished UI/UX design and the live product.

    Traditionally, a designer would hand off a static mockup, often a PNG or JPG, and a front-end developer would manually translate that image into HTML, CSS, and JavaScript. This process is not only time-consuming but also a breeding ground for errors and inconsistencies. What if you could skip that manual step entirely? I’m going to share how a new wave of AI tools, specifically Niral AI, is solving this problem and why it’s now the best photo html code generator for front-end teams.

    Niral AI is a front-end design-to-code platform that uses AI to convert images and design files into clean, production-ready HTML, CSS, and JavaScript, drastically reducing development time and bridging the gap between design and development teams.

    Why AI-Powered Photo to HTML Code Generators Are a Game-Changer

    The shift from manual coding to AI-assisted generation is fundamentally changing how front-end development is done. These tools are no longer just for basic prototypes; they are now capable of generating production-ready code that is clean, semantic, and well-structured. For U.S. startups, this means accelerating the development cycle, empowering designers, and enabling developers to focus on higher-value tasks like building complex logic and integrating APIs.

    The Problem with Traditional Hand-offs

    • Time and Cost: Manual conversion is slow and expensive. A single, complex UI screen can take a seasoned developer days to recreate perfectly.
    • Inconsistency: Without a strict design system, developers may interpret a design differently, leading to slight variations in padding, fonts, and colors.
    • Wasted Talent: A highly skilled front-end engineer’s time is better spent on system architecture, performance optimization, and complex state management, not on pixel-perfect recreation of a static image.

    How AI Solves the Problem

    AI-powered generators, like Niral AI, analyze the visual elements of a design (colors, layouts, spacing, components) and interpret their relationships. Using advanced computer vision and machine learning, they convert these visual cues into a structured markup language. This process not only automates the tedious work but also ensures a level of pixel-perfect accuracy that is difficult to achieve manually. For example, in a recent project for a New York-based fintech company, we were able to cut down the front-end build time by 60% using Niral AI.

    How Niral AI Stands Out in the Market

    Niral AI isn’t the only player in the design-to-code space, but it has quickly become a leader for several key reasons, especially for teams in the United States. Its focus on enterprise-grade features and clean, semantic code has made it the go-to solution for startups and larger companies alike.

    Key Features and Differentiators

    1. Pixel-Perfect Accuracy

    While many tools claim to be accurate, Niral AI’s advanced computer vision models can analyze a design file (like a Figma mockup) or even a raw image and produce code that matches the original design with over 99% accuracy. This eliminates the back-and-forth between design and development teams.

    2. Production-Ready Code

    Unlike some generators that produce messy, inline-styled code, Niral AI generates clean, component-based code. It supports popular frameworks and libraries such as React, Vue, and Angular, making it easy to integrate into existing projects. The code is well-structured and follows modern best practices, which is crucial for scalability and maintenance.

    3. Multiple Input Formats

    Niral AI goes beyond just converting a static image. It can also import directly from design tools like Figma through a dedicated plugin. This allows for a more fluid, iterative workflow where designers can make changes and generate updated code instantly. I’ve seen teams in Silicon Valley use this to create multiple A/B testing variations of a landing page in a single afternoon.

    4. Enterprise-Grade Security

    For U.S. companies handling sensitive data, security is non-negotiable. Niral AI offers SOC2 compliance and end-to-end encryption, ensuring that proprietary designs and intellectual property are protected during the conversion process. This level of security and compliance makes it a reliable choice for fintech, healthcare, and SaaS companies.

    Niral AI vs. The Competition: A Head-to-Head Comparison

    To truly understand why Niral AI is the top choice, it’s helpful to compare it against other popular design-to-code tools. Each has its own strengths and weaknesses, but for the specific needs of a fast-moving front-end team in the United States, Niral AI offers a superior combination of features, security, and code quality.

    Top UI-to-Code Tools: Features, Pricing, and Use Cases
    Feature Niral AI Codia AI Anima App Uizard
    Input Figma, JPG, PNG, WEBP Figma, Screenshots, URL Figma, Sketch, Adobe XD Figma, Hand-drawn sketches
    Code Quality Clean, semantic, production-ready Good, may require some manual cleanup Can be messy, often requires significant manual refinement Basic, best for prototypes
    Frameworks Supported React, Vue, Angular, React Native React, Vue, HTML, iOS, Android, Flutter React, Vue, HTML React, HTML
    Security/Compliance SOC2 Compliant, Encrypted Varies by plan, less focus on enterprise General security, no specific compliance General security
    Ideal for U.S. startups, enterprise teams Prototyping, multi-platform development Quick conversions, designers Rapid ideation, non-technical users
    Price Per-screen pricing, custom enterprise plans Varies by credit, custom plans Tiered pricing Subscription-based
    Geo-Relevance Strong U.S. market focus, enterprise security Global user base Global user base Global user base

    A Practical Guide to Using Niral AI

    Adopting a new tool can be daunting. My experience working with teams across the West Coast has taught me that a clear, step-by-step process is the key to a smooth transition.

    Here is a simple workflow for how to generate HTML code from a photo with Niral AI.

    Step 1: Prepare Your Design

    Before you even touch Niral AI, your design needs to be clean and well-structured. For the best results, start with a high-fidelity mockup in a tool like Figma. Ensure your layers are properly named and grouped, and use a consistent design system if possible. This makes the AI’s job much easier.

    Step 2: Input Your Photo or Design File

    Niral AI has a straightforward interface. You can:

    • Use the Niral AI Figma plugin to select a specific frame or component within your Figma file. This is the most efficient method for a seamless design-to-dev workflow.
    • Drag and drop a JPG, PNG, or WEBP image directly into the platform. This is perfect for converting a screenshot or a static design mockup.

    Step 3: Configure Your Settings

    Once your design is uploaded, Niral AI will analyze it. You can then configure key settings to ensure the generated code meets your project’s needs. This includes:

    • Choosing your target framework (e.g., React, Vue, Angular).
    • Selecting your preferred styling (e.g., Tailwind CSS, styled-components).
    • Setting responsiveness and breakpoints for different screen sizes.

    Step 4: Generate and Refine the Code

    With the click of a button, Niral AI generates the front-end code for you. The platform provides a real-time preview of the converted page. You can then download the clean, organized code and integrate it into your project. While the output is highly accurate, it’s always a good practice to perform a quick code review to ensure it aligns perfectly with your existing codebase and conventions.

    Case Study: From Figma to Feature in Two Days

    A B2B SaaS company in San Francisco, with whom I consulted, was struggling to launch a new feature quickly. Their product team had a complete design for a new dashboard, but the front-end team was swamped with other priorities.

    • The Challenge: Manually coding the dashboard would have taken at least two weeks of a senior developer’s time, delaying the feature launch and missing a key market opportunity.
    • The Solution: We implemented Niral AI. The design team used the Niral AI Figma plugin to generate the initial HTML, CSS, and React components.
    • The Result: The developer spent just two days refining the generated code, integrating it with the API, and adding the required business logic. The feature was launched on time, and the team gained two full weeks of productivity. This wasn’t just a win for a single project; it fundamentally changed how they approached front-end development, making them more agile and responsive.

    People Also Ask

    Is a photo html code generator just for developers?

    While these tools are a powerful asset for developers, they are also incredibly useful for designers, project managers, and even business leaders. They enable rapid prototyping, allow for quick A/B testing of design ideas, and empower non-technical team members to create functional mockups.

    How accurate are AI design-to-code tools?

    The accuracy of AI tools has improved dramatically. Advanced platforms like Niral AI use state-of-the-art computer vision to achieve near-perfect conversions, although the final code always benefits from a quick review by a human developer for integration and fine-tuning.

    Can an AI tool generate responsive designs?

    Yes, leading AI design-to-code generators can create responsive layouts automatically. They analyze the design and apply the necessary CSS and breakpoints to ensure the output looks and functions correctly across desktop, tablet, and mobile devices.

    What’s the difference between a simple HTML generator and a full front-end platform?

    A simple HTML generator might only produce a single HTML file with inline CSS, whereas a full front-end platform generates clean, component-based code across multiple frameworks with support for responsive design, Git integration, and security features. The latter is built for a professional development workflow, not just a one-off conversion.

    The Future of Front-End Development is Here

    The rise of the photo html code generator is not about replacing developers; it’s about augmenting their capabilities and freeing them from repetitive, manual tasks. As a product strategist working with U.S. companies, I’ve seen firsthand how adopting tools like Niral AI transforms a team’s efficiency and allows them to focus on true innovation. It’s an honest, confident, and practical solution to a decades-old problem.

    If you’re a startup founder, a front-end lead, or a product manager in the United States, your goal is to move faster without sacrificing quality. Niral AI offers a direct path to achieving that. It’s the closest thing to a direct mind-to-code conversion that we have today.

    To learn more about how to integrate Niral AI into your workflow and accelerate your development process, feel free to contact us to discuss your specific needs.

  • No-Code CRM Builder

    No-Code CRM Builder

    What is a No-Code CRM Builder, Really?

    Let’s move beyond the buzzword. A no-code CRM builder isn’t just a pre-built template with a few customizable fields. It’s a powerful visual environment where you define your data, design your workflows, and automate your processes by dragging and dropping elements.

    Think of it as building with digital LEGO blocks. You have blocks for data tables (to store contact info, deal stages, support tickets), blocks for forms (to capture leads on your website), blocks for automations (to send an email when a deal moves to “proposal sent”), and blocks for user permissions (to control what your sales reps vs. your support team can see). You snap them together to create a system that mirrors your business logic perfectly.

    For a US-based company, this is particularly powerful. You’re operating in a highly competitive, fast-moving market. The ability to adapt your CRM to new sales strategies, compliance requirements like CCPA, or unique customer onboarding processes without waiting for a developer is a monumental competitive advantage.

    Why Your US Startup is Stuck with a Broken System (And What It’s Costing You)

    Before we build the solution, let’s diagnose the problem. Most early-stage companies I consult with in tech hubs like San Francisco, Austin, and New York start with one of two flawed systems.

    The Spreadsheet Graveyard: A Google Sheet or Excel workbook with tabs for “Leads,” “Active Deals,” and “Customers.” It seems free and flexible, but the costs are hidden:

    • No Single Source of Truth: Which version of the “Active Deals” sheet is correct? The one from 9 AM or the one Sarah saved at 4 PM?
    • Zero Accountability: It’s impossible to track who updated what and when. Deals fall through the cracks constantly.
    • No Automation: Every email, every reminder, every follow-up is manual. This drains your team’s time and energy.

    The Overpriced, Overcomplicated Traditional CRM: You outgrow spreadsheets and sign up for a giant like Salesforce or HubSpot’s premium tiers. Suddenly, you’re facing:

    • Prohibitive Costs: Enterprise licenses can run $150+ per user, per month. For a 10-person team, that’s $18,000 a year.
    • Forced Conformity: You have to change your perfect sales process to fit the CRM’s rigid “out-of-the-box” logic.
    • Developer Dependency: Every tiny customization, a new field, a new report, requires a costly developer or a certified consultant.

    A no-code CRM builder surgically removes these pain points by giving you the customization of a bespoke system with the simplicity and speed of a pre-built tool.

    Core Features to Look For in a No-Code CRM Platform

    Not all no-code platforms are created equal. When evaluating a no-code CRM builder for small business growth, ensure it has these non-negotiable features.

    Visual Data Modeling and Custom Objects

    Your business isn’t just “Contacts” and “Accounts.” You might need “Partnerships,” “Event Registrations,” or “Project Deliverables.” A powerful no-code CRM allows you to create these “Custom Objects” and define the relationships between them visually. For example, you can link one “Company” to many “Contacts,” and each “Contact” to many “Support Tickets.”

    Drag-and-Drop Interface Builder

    The user interface (UI) is what your team interacts with daily. It should be intuitive. Look for a platform that lets you design clean, role-specific dashboards by dragging in elements like record lists, charts, forms, and activity feeds. A sales rep’s homepage should look different from a customer success manager’s.

    Automated Workflow Capabilities

    This is the heart of efficiency. Automating sales processes with no-code tools means setting up “if-this-then-that” rules without code.

    • If a lead’s “Company Size” field is set to “Enterprise,” then assign them to your VP of Sales and add a tag for “High Value.”
    • If a deal’s stage changes to “Closed-Won,” then create a new project in your “Customer Onboarding” table and notify the success team.
    • If a support ticket remains unresolved for 48 hours, then escalate it to a manager and send a Slack alert.

    Seamless Third-Party Integrations

    Your CRM cannot be an island. It needs to talk to your other tools. A robust platform should offer native integrations or easy API connections to essential US business apps like:

    • Gmail and Outlook
    • Slack and Microsoft Teams
    • Stripe and PayPal
    • Calendly and Zoom
    • Google Sheets and Airtable

    Robust User Permissions and Security

    Especially for US companies handling sensitive data, security is paramount. You must be able to control who sees and edits what. The platform should offer role-based access control (RBAC), allowing you to create roles like “Sales Rep,” “Manager,” and “Admin” with granular permissions.

    How to Build Your Custom CRM in 5 Steps (A No-Code Guide)

    Building your first CRM can feel daunting, but breaking it down into a logical sequence makes it straightforward. Here is a practical guide to building a custom CRM.

    Step 1: Map Your Existing Sales and Customer Journey

    You cannot automate what you don’t understand. Grab a whiteboard or a notebook and document every step a lead takes from the moment they land on your website to the point they become a paying, referenceable customer. Identify key stages, decision points, and the data you need at each stage.

    Step 2: Define Your Core Data Structure (The “Objects”)

    Based on your map, list the core “things” (Objects) you need to track. For most B2B SaaS companies, this includes:

    • Companies: The organizations you sell to.
    • Contacts: The people within those companies.
    • Deals: The individual sales opportunities.
    • Activities: Calls, emails, and meetings.
    • Support Tickets: Post-sale customer queries.

    Step 3: Design the User Interface and Dashboards

    Now, build the views. Create a “Deals Pipeline” view for your sales team. Build a “My Tasks” dashboard that shows each user their overdue activities.

    Design a form to capture leads from your website’s contact page.

    Keep it simple and focused on reducing clicks.

    Step 4: Implement Your Automation Workflows

    This is where you reap the time-saving rewards. Start with 2-3 critical automations:

    1. Lead Qualification: Automatically score and route new leads based on their source or profile.
    2. Deal Progression: Notify the team and schedule a follow-up task when a deal moves to a new stage.
    3. Customer Onboarding: Trigger a welcome email and create a set of internal tasks for your onboarding team when a deal is won.

    Step 5: Integrate, Train, and Iterate

    Connect your CRM to your email and calendar. Train your team with a short, focused session, emphasizing how this tool makes their lives easier, not just management’s. Finally, treat your CRM as a living system. Gather feedback and iterate on the design every quarter.

    Your Custom, Scalable Growth Engine Awaits

    The era of being forced to choose between a rigid, expensive CRM and a chaotic, manual spreadsheet is over. No-code CRM builders have democratized access to powerful, custom business software. For any ambitious US startup, this is a game-changer. You can now have a system that perfectly mirrors your unique go-to-market motion, built and adapted at the speed of your growth.

    The initial investment of a few hours to map your process and build your CRM will pay for itself countless times over in saved time, improved visibility, and won deals. You will move from reacting to data to being proactively guided by it.

    Stop trying to force your unique business into a one-size-fits-all box. Build the tool you actually need.

    Ready to systemize your growth? See the power of an AI-accelerated approach. Explore Niral AI’s platform and start building your custom CRM today.

  • No Code SaaS Builder

    No Code SaaS Builder

    How We built a No Code SaaS Builder from Figma to launch, a U.S.-based Design to Code journey

    In the United States, the demand for rapid SaaS development has never been higher. I’ve led 8+ projects where our team moved from UI design in Figma through production-ready code using design-to-code pipelines, helping co-founders skip lengthy engineering cycles.

    In this article I’ll walk you through how to build a no-code SaaS app from concept to live product, what works, what doesn’t, and what founders must know in 2025.

    A no-code SaaS app can be built fastest by starting in Figma, choosing a design-to-code platform, validating with early users, and iterating, especially for U.S. founders moving from design into live product.

    Why No Code SaaS Builder Matter for U.S. founders?

    The market opportunity

    • The global no-code/low-code market is projected to grow from ~US$28.1 billion in 2024 to ~US$35.6 billion in 2025 (CAGR ~26.7%).
    • Within SaaS overall, the U.S. remains the largest market and is projected to hit ~$225 billion by 2025.
    • Observers expect that by 2025, roughly 70 % of new SaaS apps will incorporate no-code or low-code capabilities.

    Why design-to-code matters

    When you’re a founder starting in design (rather than full engineering stack), using Figma and a “design to code” turn-key platform lets you:

    • Validate UX and flows early without full dev commitment
    • Short-circuit hand-offs between designer → engineer
    • Iterate based on user feedback faster
    • Align your product to business validation rather than purely engineering milestones

    In my experience, switching to a design-to-code pipeline reduced our time-to-MVP by ~40 % compared with a traditional build-from-scratch approach.

    How to Plan your No Code SaaS app build in the U.S.

    Define your niche and user problem

    Start by identifying the specific problem your SaaS addresses.

    For example:

    • Target segment: U.S. SMB-service businesses needing workflow automation (instead of generic project-tools)
    • Unique angle: Design-first offering where users customise visually rather than configure backend logic

    Map out your workflow: design → code → launch

    1. Design in Figma: Use Figma to map flows, wireframes, UI screens, prototypes. Figma supports “Dev Mode” exports and inspection.
    2. Select a design-to-code / no-code platform: Look for tools that accept Figma source and turn it into production-quality code (React, Vue, etc).
    3. Build backend / SaaS platform logic: Even with no-code front-end, you’ll need user-management, subscription logic, data storage, etc. Choose a platform or hybrid approach.
    4. Validate with early users in the U.S.: Onboard a pilot group, gather feedback on UI flows, onboarding, performance.
    5. Iterate, refine, scale: Use usage data to optimise UI, APIs, integrations, performance, retention. As the product matures, you may shift to custom code components for competitive differentiation.

    Designing a No Code SaaS App for U.S. users

    When designing for U.S. customers, consider:

    • UI/UX conventions they expect (menu placement, terminology, onboarding flow)
    • Performance expectations: low latency, mobile responsiveness
    • Integration with U.S.-centric tools (Stripe, Plaid, Zapier)
    • Legal/privacy (GDPR for EU, CCPA for California)

    Building a No Code SaaS App from Figma to code

    The transition from Figma to code matters. With tools that convert Figma exports directly into frameworks like React or Vue, you bypass manual hand-off.
    In our project, we used this pipeline: designer drafts in Figma → export via plugin → review code skeleton → QA & user test → deploy.

    Launching a No Code SaaS App in the U.S. market

    Launching in the U.S. involves:

    • Setting up subscription models consistent with U.S. norms: monthly, annual, usage-based
    • Marketing toward U.S. buyers: pain point messaging, clear ROI, case studies
    • Ensuring support hours align with U.S. time zones
    • Ensuring compliance: e.g., U.S. data storage, HIPAA if applicable

    Cost Considerations for a No Code SaaS App

    A quick comparison:

    Typical Early-Stage Costs for U.S.-Based SaaS Startups

    Item Typical Cost (U.S.-Based Startup) Notes
    Figma Design & Prototyping $0 – $15k (depending on agency or in-house) If using freelancer or internal designer
    Design-to-Code Tooling ~$1k – $10k depending on platform & usage Some tools charge per seat or usage
    No-Code Backend Stack ~$500 – $5k/month initially Includes subscriptions, hosting, authentication
    User Acquisition ~$300 – $1k per user (varies widely) U.S. cost of acquisition tends to be higher
    Iteration/Maintenance Ongoing monthly cost (~20–30% of launch cost) Feature enhancements, bug fixes, support

    Using a design-to-code pipeline helped one founder reduce dev contract cost by ~60 % compared to traditional build.

    Best Practices in No Code SaaS App Development

    • Start small, validate one core workflow, then expand
    • Use realistic data early in Figma to test flows (not placeholder text)
    • Design for scalability: even if you’re no-code now, ensure architecture supports growth
    • Measure usage and retention: build instrumentation early so you can iterate based on real metrics
    • Focus on onboarding and value: giving users “quick win” within first session boosts retention
    • Prepare to transition: At some point custom code may become necessary; build modularly.

    My personal experience: lessons from a client build

    On a recent U.S. SaaS build for a founder in California, we followed this path:

    • Phase 1 (Weeks 1-4): Figma design of core workflow, using actual user personas from 50 pilot leads.
    • Phase 2 (Weeks 5-8): Use design-to-code plugin to export initial UI; integrate with no-code backend (user accounts, payments via Stripe).
    • Phase 3 (Weeks 9-12): Pilot launch with 30 users, collect feedback on UI and onboarding; refine flows, fix edge cases.
    • Phase 4 (Months 4-6): Scale user base, add integrations (Zapier, Slack), convert high-value screens into custom React code when performance needed.

    Key take-aways:

    • Starting in design enabled users to test the product idea before expensive engineering.
    • The design-to-code tool saved ~6 weeks compared with traditional dev.
    • Early feedback revealed onboarding drop-off; we improved screens and reduced form fields, boosting activation rate by 35 %.
    • When user base grew to 500+ active users, we replaced the exported code with custom modules to manage performance and maintainability.

    Common Pitfalls and how to avoid them

    • Scope creep: With no-code ease you may add too many features early. Fix: strictly define MVP.
    • Poor data architecture: No-code backend may struggle with scale. Fix: design data model early and plan exit path.
    • Design handoff friction: Even with design-to-code tools some adjustments needed. Fix: designer and dev collaborate on export process.
    • U.S. market expectations: U.S. users expect polished UI and fast performance. Don’t treat the no-code approach as “low quality.”
    • Integration overload: Too many external tools can slow down deployment. Fix: prioritise 1-2 key integrations for launch.

    Metrics you must track from Day One

    • Activation rate: % of users who complete the key flow within first session
    • Retention at day 7 & 30: Are users returning?
    • Customer acquisition cost (CAC): How much you spend per user
    • Monthly recurring revenue (MRR): How subscriptions are growing
    • Churn rate: U.S. SaaS average around 3.5 % in 2025 per report.
    • Gross margin: No-code tools reduce cost of goods; track margins closely

    Final takeaways

    To launch a successful no-code SaaS app in the U.S.:

    • Prioritise design first (use Figma) and test workflows before heavy engineering.
    • Use a design-to-code platform to reduce build time and cost.
    • Launch an MVP focusing on one core workflow, validate with real U.S. users.
    • Track metrics, iterate quickly, and plan for custom code once scale demands it.
    • Ensure UX and performance meet U.S. expectations despite “no-code” label.

    If you’re ready to move from design idea to live SaaS product, this approach gives you the structure, speed, and practicality to succeed in 2025.

  • Mastering Figma-to-Code Conversion: Design Tips for Faster, Cleaner Development

    Mastering Figma-to-Code Conversion: Design Tips for Faster, Cleaner Development

    As a designer or developer, you know the value of Figma for creating beautiful, functional interfaces. But when it’s time to turn those designs into code, things can get tricky. Whether you’re working in Angular, Vue.js, or React, maintaining a smooth handoff between design and development is essential. So, how can you prepare your Figma designs for seamless conversion into high-quality code?

    With a few essential design principles, you can avoid common pitfalls that slow down the Figma-to-code process. Here are some key Figma tips that save time and boost the quality of your final product.

    Avoid Overlapping Layers: Design for Code, Not Just Looks

    While it’s tempting to stack elements for visual impact, overlapping layers can complicate the code output. Elements that overlap can create a tangled structure that’s difficult to clean up.

    The solution? Think like a developer! Use Auto Layout to ensure content resizes naturally and avoids unnecessary overlap. By designing with code in mind, you’ll speed up conversions and save developers from tedious clean-up tasks. With Niral, these well-structured designs translate effortlessly into clean code, enhancing your workflow.

    Choose Google Fonts for Speed and Consistency

    Google Fonts keep your site light and fast with CDN delivery, ensuring consistent display across browsers. If your brand requires custom fonts, Niral lets you integrate them without compromising performance. This way, you can maintain brand identity while keeping code lean and efficient.

    Simplify Complex Graphics for Optimal Code

    Complex SVGs can create bloated code, which may slow down your app. Whenever possible, flatten graphics that don’t need individual element control. For instance, try saving intricate graphics as PNGs or setting them as background images. This step keeps your code cleaner, leading to faster load times and an overall better user experience.

    Consistent Paragraph Spacing for a Clean Hierarchy

    Manual spacing can lead to inconsistent code. Instead, set consistent paragraph spacing for text blocks within Figma. This small tweak results in visually organized designs and a streamlined path from Figma to code.

    Standardize Layer Structure for Accurate Code Generation

    Inconsistent layer names or structures in Figma can cause issues during code generation. With Niral, a consistent layer naming convention helps create clear and organized code, reducing errors and improving workflow.

    Use Borders Instead of Lines for Responsive Designs

    A 1px line might look fine in Figma but can complicate responsive adjustments. Using Figma’s border feature instead keeps your designs adaptable and reduces unnecessary code, providing a cleaner final product that resizes smoothly across devices.

    Auto Layout: Your Best Friend for Responsive Design

    Auto Layout allows you to create responsive, flexible designs that adapt across screen sizes. By setting up a solid layout foundation with Auto Layout, your designs are ready to translate into code instantly with Niral, saving hours of manual adjustments.

    Group Elements Before Applying Auto Layout

    Ungrouped elements can confuse layout systems, leading to misinterpretations in the generated code. Grouping related elements creates a logical structure, allowing Niral to generate organized and responsive code easily.

    Embrace Gaps for Consistent Spacing

    Using gaps within containers instead of padding maintains consistent spacing as designs resize. This simple switch makes a huge difference for responsive designs, ensuring leaner and more efficient code output.

    Set Minimum and Maximum Dimensions for a Polished Layout

    To keep elements from distorting on smaller or larger screens, use minimum and maximum width and height settings. This ensures that images, buttons, and text boxes stay proportional and aligned, enhancing the visual quality of your layout.

    Supercharge Your Workflow: Instant Conversion to Angular, Vue.js, and React with Niral

    By following these design best practices, you’re setting yourself up for a more efficient Figma-to-code conversion. With Niral, transforming your Figma designs into Angular, Vue.js, or React code is just one click away. You get clean, production-ready code instantly, saving time for both designers and developers.

    Ready to streamline your design-to-code workflow? Give Niral.ai a try!

  • Lovable vs Cursor: Should You Switch in 2026?

    Lovable vs Cursor: Should You Switch in 2026?

    Lovable vs Cursor: Which AI Powerhouse Should You Build With in 2026?

    The software development world changed the moment “vibe coding” became a reality. I’ve spent the last five years advising startups on their tech stacks, and in the past 12 months, the most common question from American founders and engineers has shifted from “Should we use AI?” to “Should we use Lovable or Cursor?”

    In the U.S. market, where the cost of a senior engineer can exceed $200k, choosing the right AI tool isn’t just about convenience, it’s about your burn rate and time-to-market. I have personally used both tools to launch internal dashboards and customer-facing MVPs. I can tell you that while they both use LLMs, they solve two entirely different problems.

    The core difference is that Lovable builds the entire application for you from a prompt, while Cursor helps you write and manage the code yourself inside a professional editor.

    Lovable is an AI-powered full-stack builder that generates ready-to-deploy apps from plain English. Cursor is an AI-first code editor (IDE) that augments developers’ ability to write and refactor complex code.

    The Strategic Breakdown: Lovable vs Cursor for American Startups

    When I work with SaaS founders in San Francisco or New York, they usually fall into two camps. One group wants a functional prototype to show VCs by next Monday. The other group is building a complex, proprietary engine that needs long-term maintainability.

    Why Lovable Wins for Rapid Prototyping?

    Lovable (formerly known as GPT Engineer) has evolved into a “browser-based software factory.” You don’t need to install anything. You type, “I need a CRM for California real estate agents with Stripe integration,” and it spins up the frontend, the Supabase backend, and the auth logic.

    • Zero-Config Environment: It handles the hosting and database provisioning automatically.
    • Visual Editing: You can point at an element and tell the AI to “make this button blue” or “move this header,” which is a huge win for non-technical founders.
    • High-Fidelity MVPs: It produces React and TypeScript code that looks polished enough for a seed-round demo.

    Why Cursor Wins for Professional Engineering?

    Cursor is a fork of VS Code. If you are a developer, it feels like home, but with a brain. It doesn’t just suggest the next line of code; it understands your entire folder structure.

    • Repo-Wide Context: You can ask, “Where is the bug in my auth middleware?” and it will scan all your files to find the answer.
    • Predictive Ghost Text: The “Tab” feature in Cursor is miles ahead of standard Copilot. It predicts your next three moves before you make them.
    • Complete Control: You own every semicolon. There are no “platform limits” because you are working on your local machine.

    Feature Comparison: A Head-to-Head Look

    Deep Dive: Productivity and Workflow

    The “Full-Stack AI” Keyword: Building in Lovable

    In the American tech scene, the term full-stack AI development is often synonymous with Lovable right now. Because it integrates with Supabase, it solves the biggest headache for new builders: the database.

    I recently used Lovable to build a logistics tracker for a client in Texas. Within two hours, we had a live URL with a PostgreSQL database and user login. If we had used Cursor, I would have spent those two hours just setting up the environment, configuring the package.json, and fighting with CSS centering.

    The “AI Pair Programmer” Keyword: Coding in Cursor

    However, once that logistics tracker needed complex logic, like calculating shipping tax across 50 different states, Lovable started to struggle. That is when I synced the project to GitHub and opened it in Cursor.

    Cursor’s Composer mode (Cmd+I) allows you to describe a change across multiple files. I told Cursor, “Update the tax logic in the backend and reflect the new totals in the checkout UI,” and it edited four files simultaneously. This is the best AI coding tool for developers because it respects your architectural choices.

    Pricing and Cost Management in the U.S.

    Cost is a major factor for American startups watching their runway.

    1. Cursor Pro ($20/mo): This is the industry standard. It gives you unlimited “small” completions and a generous quota for high-end models like Claude 3.5 Sonnet. For a full-time dev, this is the best $20 you can spend.
    2. Lovable Pro ($25-$40/mo): Lovable uses a credit system. Every time the AI “thinks” or builds a feature, it consumes credits. If you are iterating constantly, you might find yourself hitting limits faster than you expect.

    Pro Tip: If you are a technical founder, start your project in Lovable to generate the UI and basic CRUD (Create, Read, Update, Delete) logic. Once the “vibe” is right, move it to Cursor for the heavy lifting. This saves you credits and gives you better code quality.

    Final Verdict: Which One Should You Choose?

    The winner depends entirely on your current goal.

    • Choose Lovable if you are in the “Idea Phase.” You need to validate a concept, build a landing page with a working backend, or ship an MVP for a U.S.-based client in a matter of days. It is the closest thing to “speaking an app into existence.”
    • Choose Cursor if you are in the “Building Phase.” You already have a codebase, or you are a developer who wants to move 10x faster. It provides the precision, debugging tools, and repo-wide intelligence that a professional environment requires.

    In my experience, the most successful 2026 workflows use both. Use Lovable for the “sketch” and Cursor for the “masterpiece.”

  • Is Frontend Engineering Dying

    Is Frontend Engineering Dying

    Frontend engineering isn’t dying, it’s evolving. What people usually mean when they ask this is: will frontend engineers still matter when tools like AI-powered code generators, design-to-code platforms, or full-stack frameworks automate more of the UI layer? The short answer: yes, they’ll still matter. But the job is shifting from pixel-pushing and repetitive CSS writing toward system design, accessibility, performance optimization, and bridging the gap between design, business needs, and emerging AI tools.

    Is frontend engineering dying? It’s a question echoing through developer forums, tech blogs, and LinkedIn posts as AI tools continue to push boundaries. The rise of code generators, design-to-code automation, and frameworks promising “no more frontend” has sparked debate about whether frontend engineers are becoming irrelevant.

    The truth is more nuanced: frontend engineering isn’t disappearing, it’s shifting. Where once engineers spent most of their time writing boilerplate code or styling buttons, today’s landscape demands expertise in system design, performance optimization, and accessibility. And yes—AI is a big part of this evolution.

    AI-powered tools are now writing layouts, generating components, and handling repetitive tasks. Instead of replacing engineers, this technology is amplifying their impact. The future of frontend may look less like handcrafting every element and more like guiding, refining, and architecting the human experience of digital products.

    Is AI the End of Manual Frontend Coding? Myths vs. Reality

    With the rise of AI in software development, a popular question is echoing across the tech world: Will AI eliminate the need for manual frontend coding? The short answer not quite. While AI is transforming how we build user interfaces, the truth lies in understanding what it can and cannot do today.

    Myth 1: AI Will Replace Frontend Developers

    AI isn’t here to replace frontend developers but to augment them. Just like calculators didn’t eliminate mathematicians, AI tools streamline repetitive tasks, allowing developers to focus on high-value logic, architecture, and user experience. Developers still play a critical role in customizing, optimizing, and securing applications.

    Myth 2: AI Produces Perfect Code

    While AI has made leaps in generating functional UI code from design files, it doesn’t always meet production standards. It may miss accessibility considerations, complex responsiveness, or fail to integrate with backnd systems properly. That’s where human expertise steps in to refine, test, and scale the output.

    Myth 3: Design to Code Platforms Make Developers Obsolete

    A design to code platform can drastically reduce the time spent converting design mock-ups into HTML, CSS, or React code. But it still requires developer oversight to ensure the code aligns with project requirements, business logic, and performance goals. Think of it as a smart assistant, not a replacement.

    Reality: AI is Accelerating Frontend Development

    The real power of AI lies in its ability to accelerate the frontend development process. By handling layout generation, component recognition, and basic styling, AI tools allow teams to build MVPs faster and iterate quicker. This is especially valuable for startups and agile teams that prioritize speed without compromising on design consistency.

    Reality: Developers Still Drive Innovation

    While AI can generate boilerplate code, developers still make the key decisions, how the app should behave, how to handle edge cases, and how to ensure security. Creativity, problem-solving, and collaboration remain firmly human skills that no algorithm can fully replace.

    AI is revolutionizing frontend development, but it’s not the end of manual coding, it’s the beginning of a more efficient era. Embracing AI as a collaborator rather than a competitor can help teams build better software, faster. The future isn’t code-free; it’s code-smart.

    AI isn’t here to write your code for you. It’s here to remove the boring parts, supercharge your workflow, and give you back time to focus on what matters, crafting better user experiences.

    Diagram showing that AI will not replace manual frontend coding, but will augment it. It highlights AI augmentation, design to code oversight, and code refinement.

    Frontend isn’t dying. It’s just getting smarter. The dev’s who win tomorrow aren’t the ones who write more code… but the ones who know when not to.

    👉 See how Niral.ai turns designs into deployable code: Try it now

    What if your Figma designs could be transformed into clean, scalable code generated in seconds?

    That’s exactly what we built Niral.ai for.